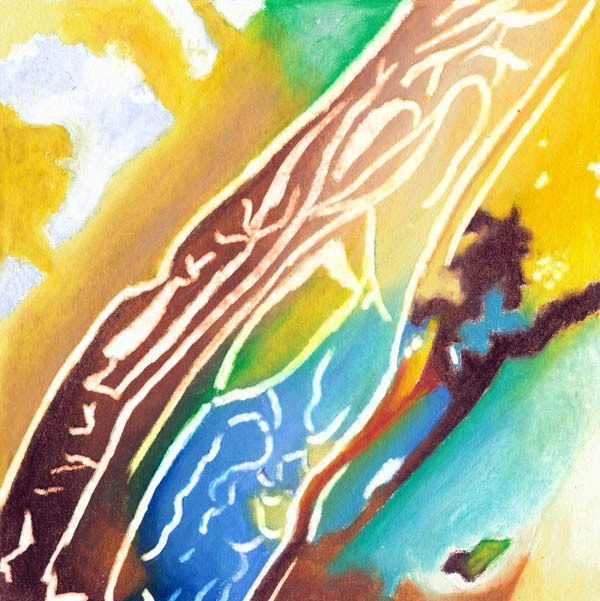
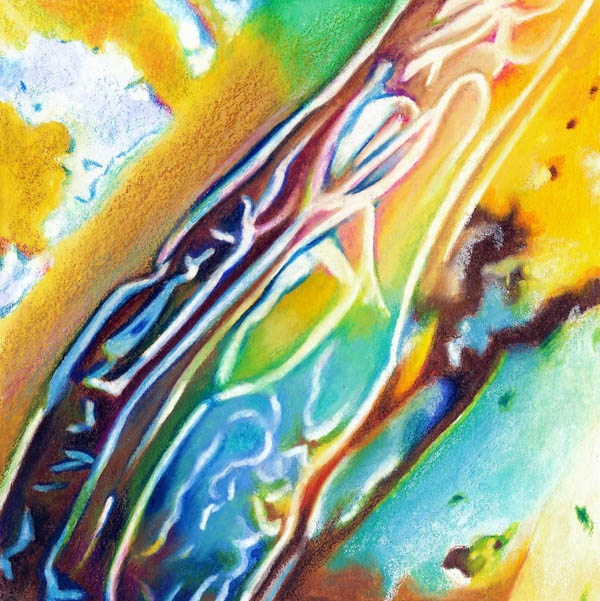
I'm working on a very detailed pebble piece. I'm combining Prismacolor colored pencil, Neopastel oil pastels & Neocolor artist crayons on Colourfix paper. I'm eager to show you a small (2"x2"), abstract close-up of my painting (18"x18") and explain the shortcuts I've taken to get around all the details.
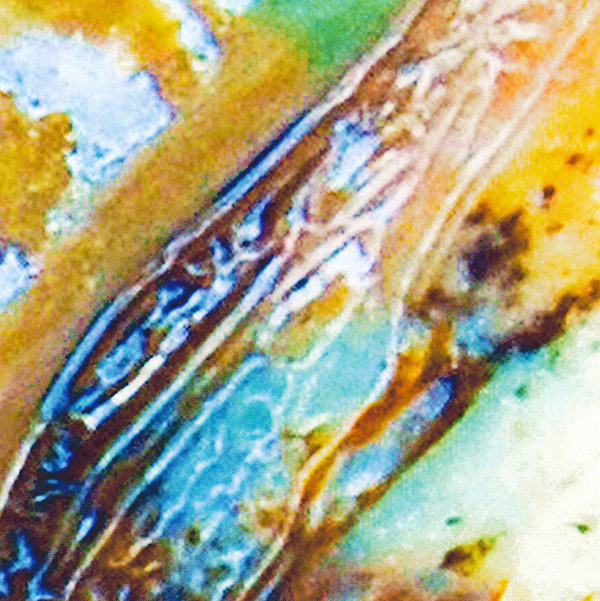
1. This is a cropping of the original photo. Even though it's very blurry you can still see all the intricate details.
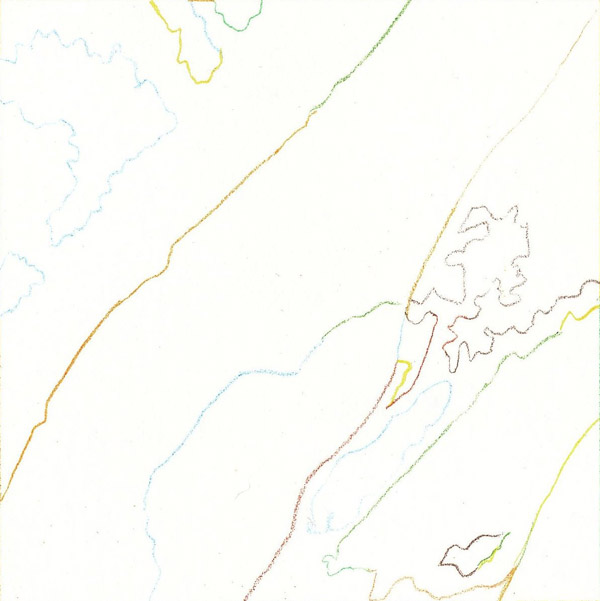
2. On my line drawing I focus on the essential lines and not the confusing details.
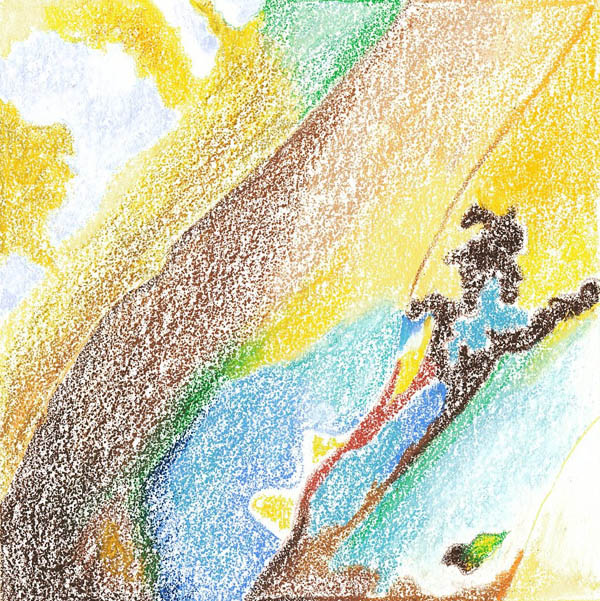
3. On the cool zone I block-in the colors with a combination of oil pastels and artist crayons.
4. I move my artwork to the warm zone of the Icarus board (high temperature) and melt all the colors with a color shaper. The waxy pigments settle into the hills and valleys of the paper, leaving plenty of texture for further layering.
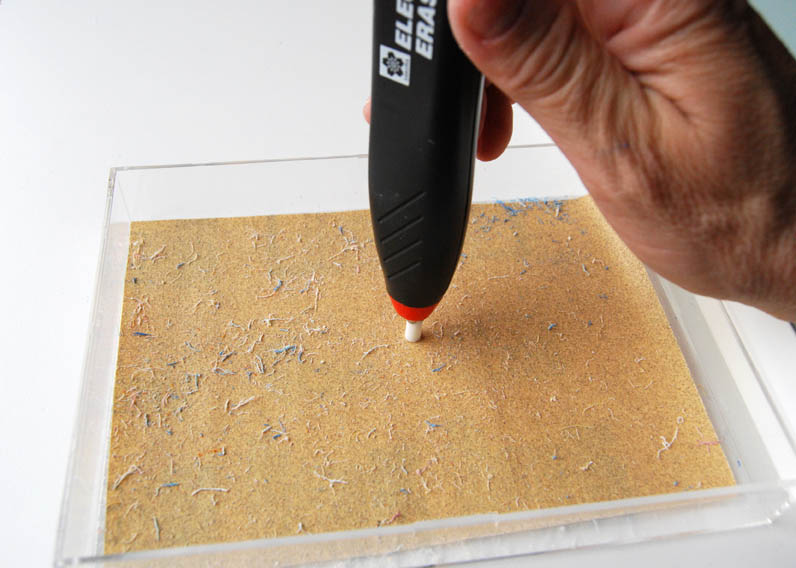
5. I'm preparing my Sakura battery-operated eraser by cleaning and flattening the tip on sand paper.
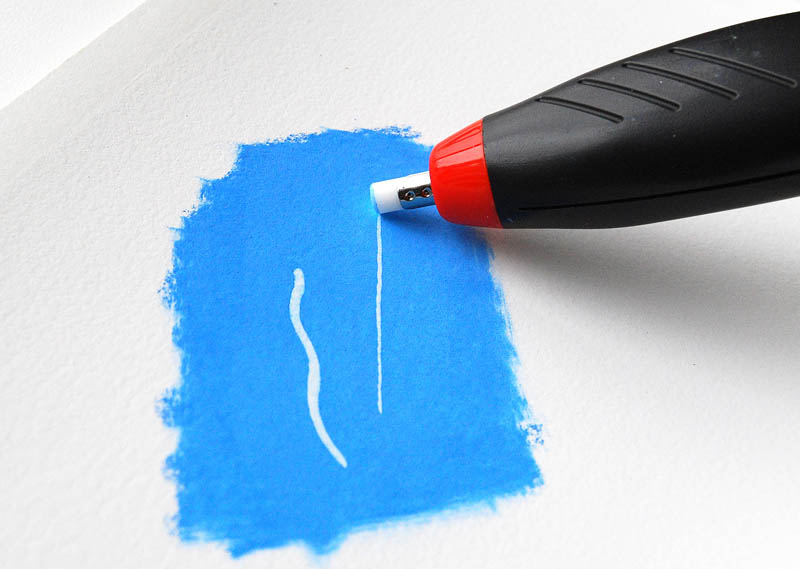
6. Here you can see how easily the pigment is lifted from the surface. By using the flat edge of the eraser point, I can achieve a very fine line.
7. I lift all the waxy pigments until the white of the paper shows through.
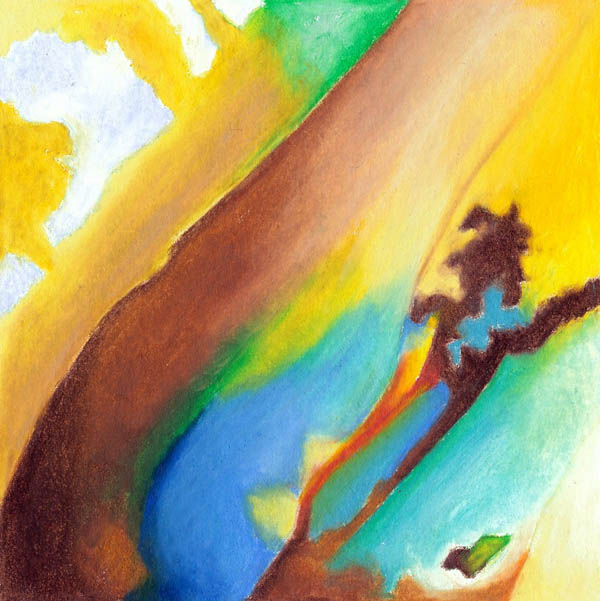
8. I can now develop the colors and values and finish the details with colored pencils. During this phase I lower the Icarus Board temperature to a medium setting.
This shortcut allowed me to work from "large" to "small" without getting bogged down in details too early in the process.
7 comments
Betzi Stein
October 05, 2010
Thanks Ester.Good idea using the Sakura that way. On the high temp, would you turn the dial all the way up? And med. temp, would that be around 4 or 5ish? FYI, I just checked my dial to ask about the temps and found that the highest mine goes to is 8.
Ester Roi
October 05, 2010
Yes, when I melt the Neocolors/Neopastels I turn the dial all the way up as far as it goes - about 8. Medium temperature is 3 to 4.
Cynthia Mazzaferro
October 05, 2010
Hey Ester
Thanks for sharing wouldn’t have thought you could get down to white with electric eraser once you used the crayons. Looks like a reflection of a beach with palm trees. Hope all is well say hi to Mario
Ester Roi
October 05, 2010
Hi Cynthia, thank you for visiting. I’m glad you found my post useful!
Janet Grundas
October 05, 2010
Thank you very much for showing us some detail ideas. I will try them out with my next project. Jan
Ester Roi
October 05, 2010
Hi Jan, let me know how this tip will work for you.
“Fire and Ice” | Ester Roi
October 24, 2010
[...] you can read about the specific technique I used for this artwork on a previous post titled A Shortcut for Details. Trackback2 comments on this [...]