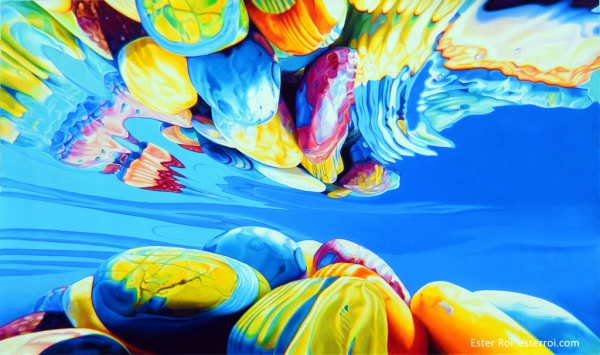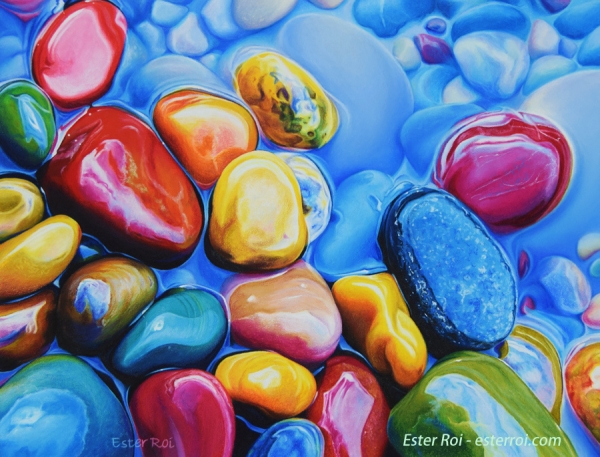
My latest artwork, titled "McDonald Creek, No. 3", was inspired by the ripples reflected on the colorful pebbles of the McDonald Creek, Glacier National Park, Montana. This piece has a very abstract slant due to its close-up take and the refraction caused by the running water.
Size: 12" x 16"
Medium: Luminance and Prismacolor colored pencils, and Golden Matte Acrylics
Surface: Art Spectrum Colourfix Supertooth board
Technique: Icarus Painting Board
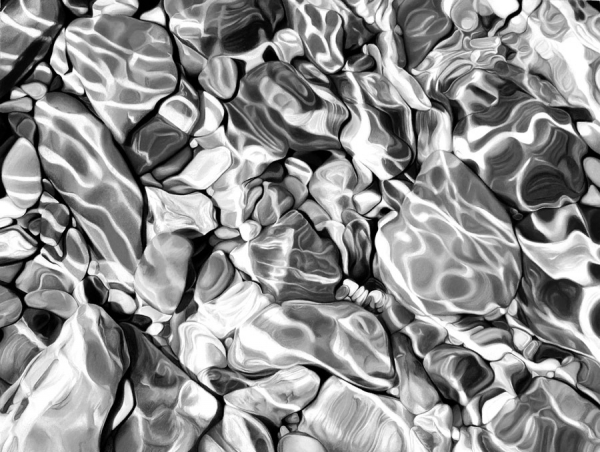
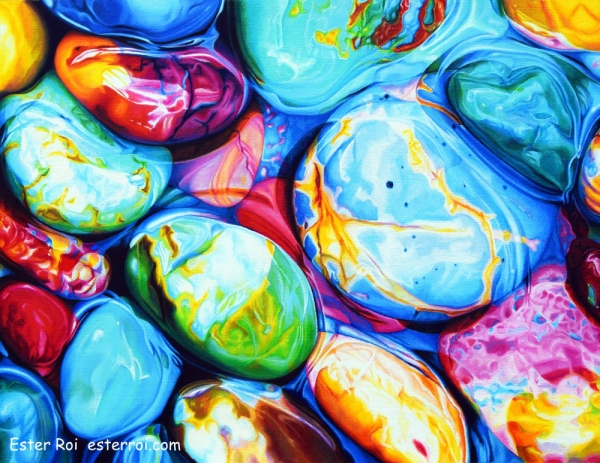
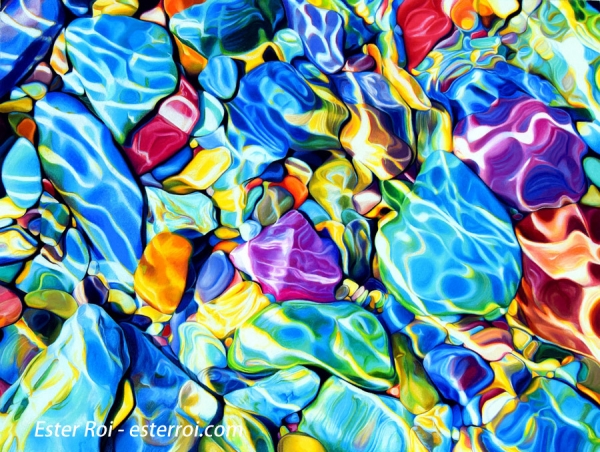
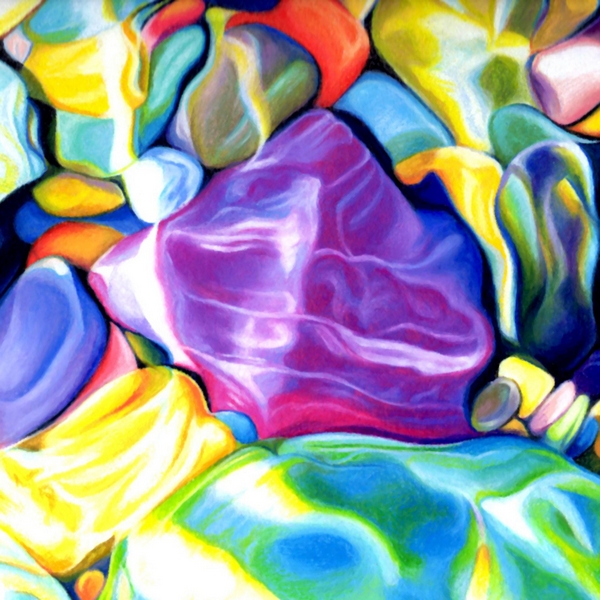
Even with abstract work, value and composition are still of the outmost importance. A value range from 0 to 10 brings form and depth to life. Colors, of course, always evoke a strong emotional response but if the values are incorrect, the colors will not work.
I normally block in the main colors with artist crayons and wax pastels (Neocolors). This time I wanted to experiment with acrylics. Since colored pencils adhere only mechanically to acrylics, it's crucial to use a surface with a strong tooth, especially when framing without glass. After acrylics dry, the tooth is then still available for colored pencils.
Regular acrylics are usually glossy and that finish interferes with colored pencil adhesion. However, Golden Matte Acrylics, Fluid or Heavy Body, are less sleek than gloss acrylics and provide a better surface for colored pencils.
So, what are the advantages of using acrylics with colored pencils? I discovered two helpful applications.
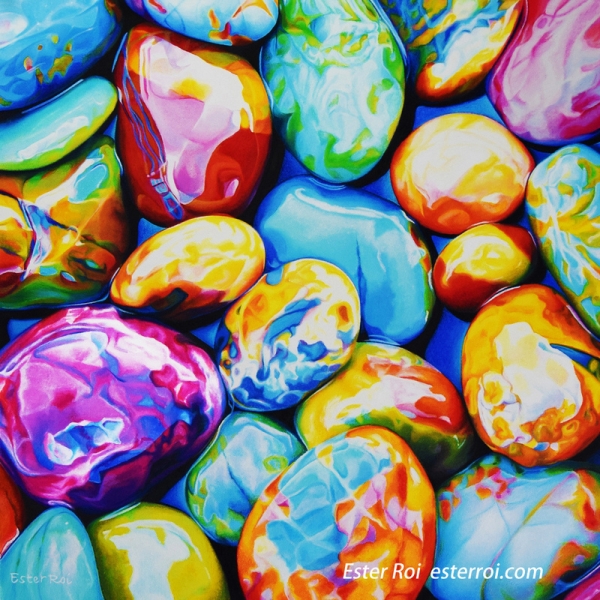
USING ACRYLICS TO BLOCK IN COLORS
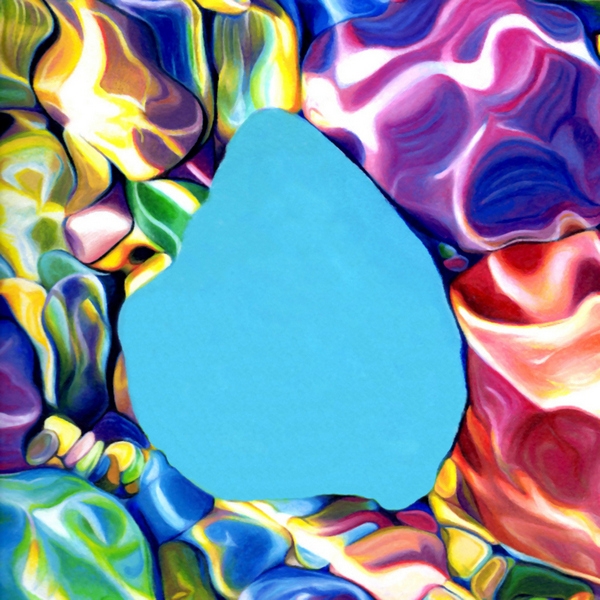
Acrylics are perfect for covering large areas of flat color; they can be brushed on quickly and they dry in a jiffy. I chose to paint this pebble with a middle value. With a few brush strokes, using paint thinned with water, I completely obliterated the white of the paper.

I then created the ripples with white paint and a lighter value of the local color. I don't worry about being precise at this point; that's where colored pencils will come in handy.
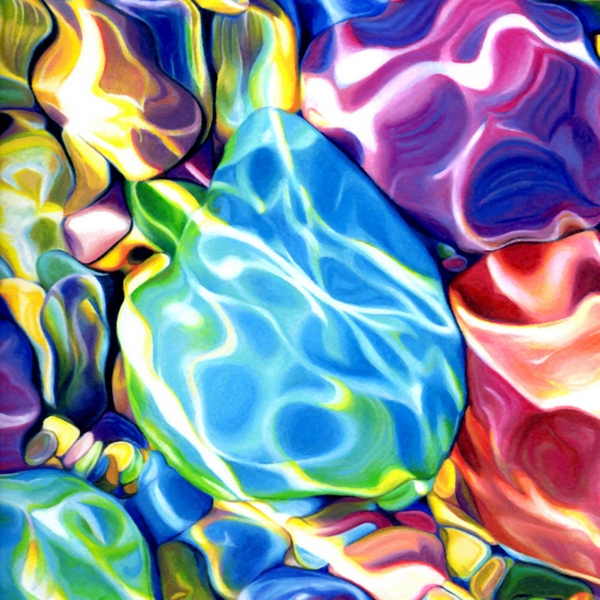
After turning on the heat of my Icarus Painting Board (medium setting), I began developing colors, values and details with colored pencils in my usual fashion, blending with a paper stump when necessary. The acrylic under-layer is left uncovered in some areas to allow for optical blending.
USING ACRYLICS TO GLAZE

I use only lightfast colored pencils and some of the colors in the pink, purple and violet family are a little dull and not as bright as their fugitive counterparts.
If you're a fan of bright colors like I am, you'll be happy to know that there's a way to remedy that dullness. Acrylics are lightfast and can be glazed over colored pencils. On this pebble I painted a very light mixture of Golden Quinacridone Magenta and Golden Acrylic Glazing Liquid. The glaze worked wonderfully but it took me two tries to get it right.
On the first try, the glaze darkened the overall values. So I reworked the pebble on my Icarus Painting Board; the heat allowed me to easily remove the acrylic glaze using colored pencils alone. After lightening the values, I then re-glazed the pebble (no heat). Acrylics can also be used for touch-ups, especially when highlights have lost their luster; a little Titanium white can do wonders.